
Learning how to plan a trip with Google Maps is one of the smartest moves you can make before any journey. Google Maps lets you research destinations, save places, build custom itineraries, download offline maps, and navigate in real time, all from a single app on your phone. Whether you are heading to a nearby city for the weekend or crossing multiple countries for a month, this guide walks you through every feature you need to use it like a seasoned traveler.

Why Google Maps Is a Traveler’s Best Friend
Most people use Google Maps to get directions from point A to point B. But the app is far more powerful than that. It functions as a research tool, a personal travel planner, and a safety net when you lose internet connection abroad.
According to Google’s own travel planning resources, the app allows users to create lists, share itineraries with travel companions, and explore neighborhoods through Street View before ever setting foot in a new place. That combination of features makes it one of the most versatile tools available for trip planning, and it costs nothing to use.
Step 1: Start with Destination Research
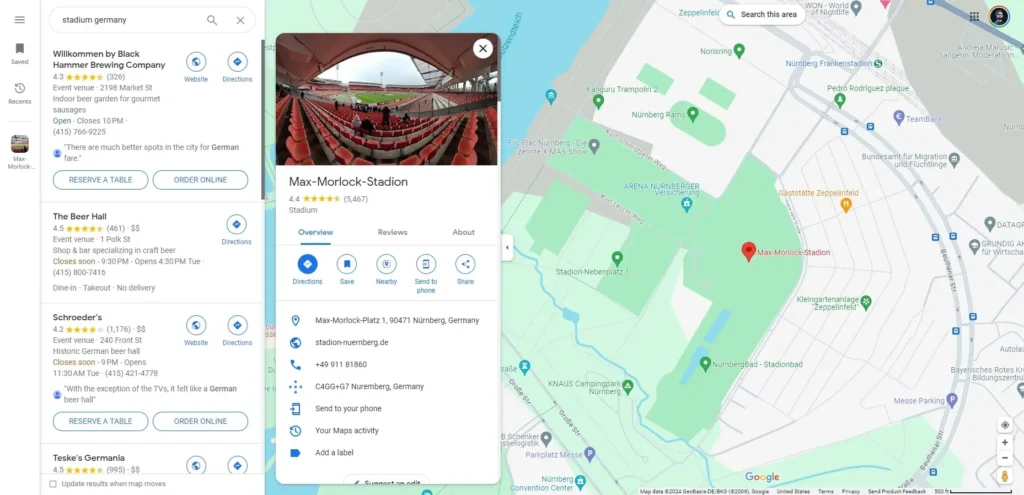
Before booking anything, open Google Maps and search for your destination. Zoom in on the city or region and start exploring the map visually. You will quickly see clusters of attractions, restaurant hubs, hotel districts, and transit corridors.
Click on any point of interest to get a snapshot: photos, opening hours, user reviews, and the address. This bird’s-eye view helps you understand the geography of a place before you arrive, so you can plan which neighborhoods to stay in and which areas to prioritize each day.
Use Street View to virtually walk through areas you are considering. This is especially useful when comparing hotel locations or checking whether a neighborhood feels walkable and safe for your travel style.
Step 2: Create a Custom Map with Saved Places
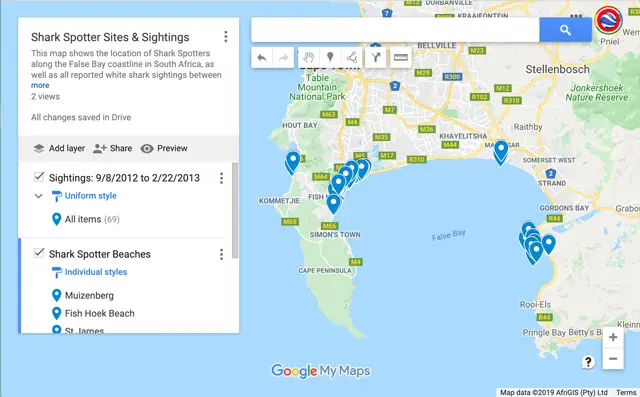
This is where Google Maps truly shines for trip planning. You can build a personal map with all the places you want to visit, organized by category or day.
Here is how to do it:
- Go to Google My Maps on a desktop browser.
- Click “Create a New Map.”
- Add layers (think of them as categories): one for restaurants, one for museums, one for day trips, etc.
- Search for places and add them to the appropriate layer.
- Color-code each layer so your map is easy to read at a glance.
Once your map is ready, it syncs automatically with the Google Maps app on your phone. You can also share it with travel companions so everyone can collaborate on the itinerary.
This method replaces the scattered screenshots, bookmarks, and browser tabs that most travelers juggle before a trip. Everything lives in one place, accessible offline if needed.
Step 3: Use the “Saved” Feature on Your Phone
If building a full custom map feels like too much work before a short trip, the built-in “Saved” feature inside the regular Google Maps app is a lighter alternative.
Tap any place on the map, then tap the bookmark icon. You can save it to a default list like “Want to go” or create a new list with a custom name, for example “Rome Day 1” or “Best Coffee Spots in Lisbon.”
These saved lists are accessible from the bottom menu of the app under “Saved.” They work well for quick trips or when you are still in the early stages of research and not yet ready to commit to a full itinerary.

Step 4: Download Offline Maps Before You Travel
One of the most practical things you can do before a trip is download offline maps for every destination on your itinerary. This is especially critical if you are traveling internationally and want to avoid hefty roaming charges.
To download an offline map:
- Search for a city or region in Google Maps.
- Tap the name of the place at the bottom of the screen.
- Scroll down and tap “Download offline map.”
- Adjust the area you want to cover and confirm.
The Google Maps offline feature lets you search for places, get turn-by-turn directions, and navigate without any internet connection. Offline maps do expire after about 30 days, so download them close to your departure date.

Step 5: Plan Your Daily Routes
Once you have your saved places ready, it is time to sequence them into logical daily routes. This is the most satisfying part of the planning process, and Google Maps makes it surprisingly easy.
Tap the directions icon and add multiple stops to a single route. The app will calculate the most efficient path between them and give you estimated travel times by walking, driving, or public transit.
A few tips for building daily routes:
- Group places that are geographically close to each other on the same day. Avoid zigzagging across a city unnecessarily.
- Check opening hours for each attraction directly in the app. Nothing derails a day faster than arriving at a closed museum.
- Build in buffer time. Google Maps is optimistic about walking speeds; real-world travel with luggage, crowds, or photo stops always takes longer.
If you are visiting a major city, use the transit layer to understand bus and metro options. The app integrates live transit data in hundreds of cities around the world, which means you can see real departure times and line connections.
Step 6: Explore Nearby Options on the Go
Even the most detailed itinerary will hit unexpected detours: a restaurant that is fully booked, a street festival that blocks your planned route, a rainy afternoon that calls for a change of plans.
Google Maps handles spontaneity well. Use the “Explore” tab (the compass icon) to discover what is near your current location. Filter by category, such as food, coffee, attractions, or hotels, and sort by rating or distance.
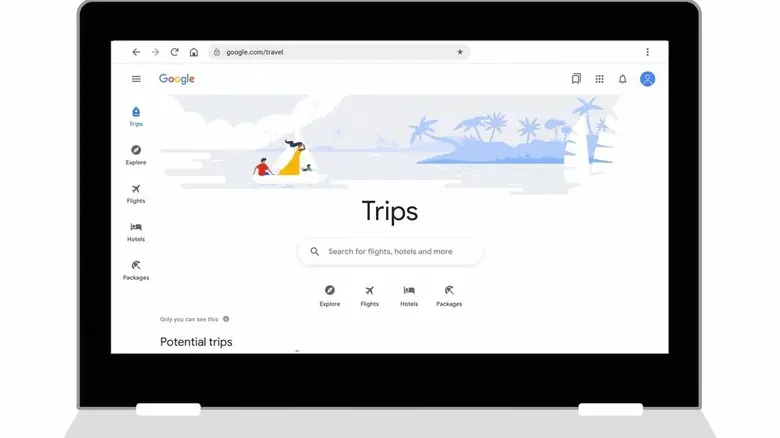
The app also shows real-time busyness data for restaurants and tourist sites, pulled from aggregated location data. This is genuinely useful for avoiding lines or choosing a less crowded time to visit a popular landmark. The Google Travel planning hub connects seamlessly with Maps to help you check flight prices and hotel availability for the same destination you are already researching.
Step 7: Share Your Itinerary with Your Travel Group
If you are traveling with family or friends, Google Maps makes coordination much easier. You can share your custom My Maps link with anyone, and they can view (or edit, if you give them access) the same map on their own devices.
For real-time coordination during the trip, use the “Share location” feature. This lets travel companions see each other’s live positions on the map, which is invaluable at busy airports, theme parks, or any destination where your group might split up.
Bonus Tips to Get More Out of Google Maps
Use the “Explore” tab for restaurant research. Filter by cuisine type, price range, and rating. Read recent reviews to check for any drops in quality or changes in hours.
Check the photos section carefully. User-submitted photos in Google Maps are often more honest and current than official tourism websites. They show real conditions, crowd levels, and the actual ambiance of a place.
Look at the “Questions and Answers” section on business listings. Travelers often ask and answer practical questions (Is there free parking? Is it stroller-friendly? Do they accept cards?) that do not appear anywhere else online.
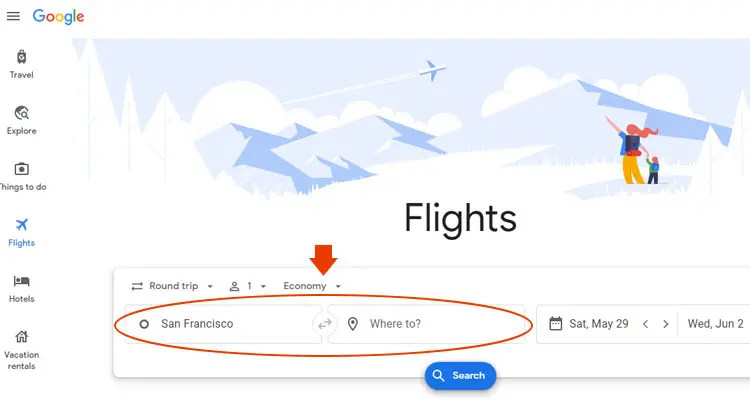
Pair Google Maps with Google Flights for the full planning toolkit. Google Flights tracks price trends and helps you identify the cheapest dates to fly, and then Google Maps picks up once you land.
Final Thoughts
Knowing how to plan a trip with Google Maps turns a tool you already use for navigation into a complete travel planning system. From researching neighborhoods and saving dream restaurants to building day-by-day routes and navigating offline in remote areas, every stage of trip planning benefits from what this app offers.
Start with a custom map on your desktop, download your offline maps a few days before departure, and let Google Maps be your guide from the moment you search for a destination to the moment you arrive back home. The more intentionally you use it, the better your travel experiences will be.